Overview
It’s normal that when we got a video that there are black board or black bars on its edge. And it’s incompatible for a same video to playback on different device. In this case, we need to crop the video to cut a video with large dimension to a smaller size and resolution, so as to make it fit the screen of portable devices. Cropping a video could also satisfy our needs of removing unwanted portion of a video image so that we can better focus on certain area.
If you have a video or movie that need to be cropped, you are coming to right place. This post is aim to introduce you a powerful video cropper as well as provide you with a step by step tutorial of cropping a video.
Introduction of Video Cropper
Gilisoft Video Cropper is a powerful all-in-one video editor, which can crop all kinds of video files whatever it is in AVI, MP4, MKV, VOB, WMV, MOV, FLV, 3GP, SWF, OGV, WebM, RMVB, Apple ProRes, MXF, AVCHD, MTS, MOD, TOD, DV, MPEG-1, MPEG-2, DivX, Xvid, etc.
With Gilisoft Video Editor, you can crop video as well as keep or change the video size, crop movie as well as keep or change the video format, and crop video as well as keep or change the video aspect ratio.
It doesn’t get much easier than this to cropping a video. And you can also use this video editor to trim video into several clips, add or remove subtitles for movie files, add effect or watermark to a video file, etc.
How to Crop Video with Video Editor
Step 1 >> Download and Install
Free download Gilisoft Video Editor for Windows, install and run it, you will see the following main window of the program. And click on the “Cropper” module on the left.
Step 2 >> Load Video Files You Want to Crop
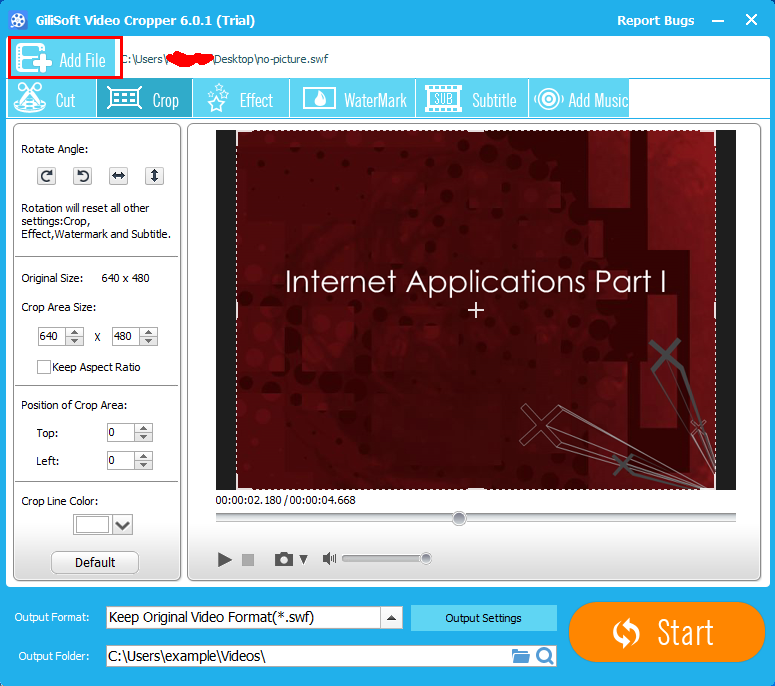
Click on “Add File” button to load your video file. It supports a large number of video formats including MP4, AVI, WMV, MOV, ASF, FLV, WebM, OGV, WTV, MPG, MKV, VOB, MXF, AVCHD and etc. Or you can directly drag and drop your video file into the main window of Video Editor.
Step 3 >> Video Cropping Settings
Method 1: Crop video by adjust the cropping frame
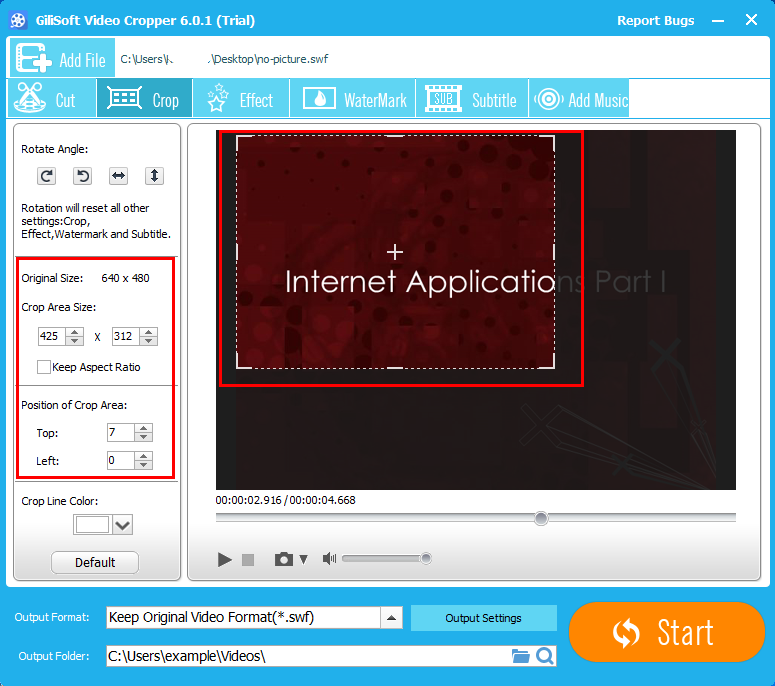
You can adjust the cropping frame (the dashed-line area) manually in the left Original Preview window while viewing the real-time effect.
Method 2: Crop video by setting the cropping values
You can input the exact value of “Crop Area Size”, “Position of Crop Area” on the left side of main window. You can set each value by typing in the number of pixels to be cropped in the text fields to crop your movie video, and the cropping frame will move accordingly.
Step 4 >> Set Output Format
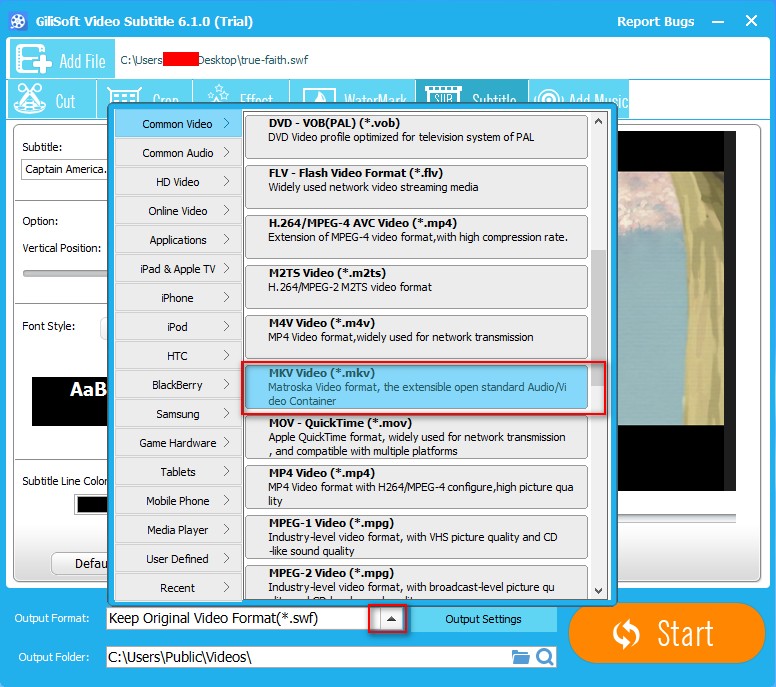
Click the little triangle drop down button to select preferable video format for the cropped video. You can select the same format as the original video or select a different format.
Step 5 >> Finish Cropping Video
Click on the “Start” button to start and finish cropping your video to remove a black border around a video, to cut out the top and bottom of video image, to change the aspect ratio of the output video, to get a close-up of a subject of interest and etc.


