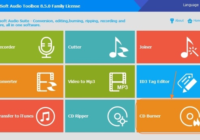
How to Add Text and Picture Watermark to a Video File

Overview

How to protect your own copyright of a video/movie? It’s tried and true practice that is adding watermark to a video. It depends on your personal needs of adding types of watermark including website url, company/individual logo, and some special texts.

Here comes the question – how to add watermark to a video. Is it difficult? The following part will take you into a solution of adding watermark to a video without any trouble.

Make Preparation

Before jump right into the following steps, you need to download and install an easy-to-use video editor, which includes adding watermark function. Gilisoft Video Editor is highly recommended here since it’s notably simply and fast.

 Step 1 >> Download and Install

how-tos-wiki-img

Download the Gilisoft Video Editor from the button below. And then install it step by step according to its installer wizard. Once it’s successfully installed, just run it, and you will see the program window as shown in following picture.

video-editor-main

 Step 2 >> Load Your Source Video File

Select the “Watermark” module, and then click on the “Add File” button to import your source video file in which you want to add watermark.

add-file

 Step 3 >> Add Text or Picture Watermark to Your Video

After loading your video file, you can add watermark now. And you can choose which type of watermark you are willing to add – Text and Picture. On the left side of the main program window, you can find two icons. One is used to add text watermark, the other is used to add picture watermark. Below is an sample of showing adding both text watermark and picture watermark.

add-watermark-to-video

More Options
1. Set duration of your watermark – you can decide where to add watermark to your video.
2. Adjust the transparency of your watermark – to better fulfill your requirements, you can change the transparency of a watermark.
3. Watermark size – you can set the size of a watermark.

 Step 4 >> Set Output Format

Gilisoft Video Editor is also a video converter software. That means you can change the output formats of your video during adding watermark process. There is no doubt that if you don’t want to change the output format, just keep it as original. Converting a video format is mainly suit for multiple devices needs.

set-output-format

 Step 5 >> Complete Adding Watermark

When everything is done, please click on the “Start” button to finish adding watermark to your target video.


How to Crop Video with Best Video Editing Software

Overview

It’s normal that when we got a video that there are black board or black bars on its edge. And it’s incompatible for a same video to playback on different device. In this case, we need to crop the video to cut a video with large dimension to a smaller size and resolution, so as to make it fit the screen of portable devices. Cropping a video could also satisfy our needs of removing unwanted portion of a video image so that we can better focus on certain area.

If you have a video or movie that need to be cropped, you are coming to right place. This post is aim to introduce you a powerful video cropper as well as provide you with a step by step tutorial of cropping a video.

Introduction of Video Cropper

Gilisoft Video Cropper is a powerful all-in-one video editor, which can crop all kinds of video files whatever it is in AVI, MP4, MKV, VOB, WMV, MOV, FLV, 3GP, SWF, OGV, WebM, RMVB, Apple ProRes, MXF, AVCHD, MTS, MOD, TOD, DV, MPEG-1, MPEG-2, DivX, Xvid, etc.

video-editor-main

With Gilisoft Video Editor, you can crop video as well as keep or change the video size, crop movie as well as keep or change the video format, and crop video as well as keep or change the video aspect ratio.

It doesn’t get much easier than this to cropping a video. And you can also use this video editor to trim video into several clips, add or remove subtitles for movie files, add effect or watermark to a video file, etc.

How to Crop Video with Video Editor

 Step 1 >> Download and Install

how-tos-wiki-img

Free download Gilisoft Video Editor for Windows, install and run it, you will see the following main window of the program. And click on the “Cropper” module on the left.

video-cropper

 Step 2 >> Load Video Files You Want to Crop

Click on “Add File” button to load your video file. It supports a large number of video formats including MP4, AVI, WMV, MOV, ASF, FLV, WebM, OGV, WTV, MPG, MKV, VOB, MXF, AVCHD and etc. Or you can directly drag and drop your video file into the main window of Video Editor.

add-video-to-crop

 Step 3 >> Video Cropping Settings

Method 1: Crop video by adjust the cropping frame
You can adjust the cropping frame (the dashed-line area) manually in the left Original Preview window while viewing the real-time effect.

Method 2: Crop video by setting the cropping values
You can input the exact value of “Crop Area Size”, “Position of Crop Area” on the left side of main window. You can set each value by typing in the number of pixels to be cropped in the text fields to crop your movie video, and the cropping frame will move accordingly.

video-crop-area

 Step 4 >> Set Output Format

Click the little triangle drop down button to select preferable video format for the cropped video. You can select the same format as the original video or select a different format.

set-output-format

 Step 5 >> Finish Cropping Video

Click on the “Start” button to start and finish cropping your video to remove a black border around a video, to cut out the top and bottom of video image, to change the aspect ratio of the output video, to get a close-up of a subject of interest and etc.

How to Convert VOB Video to PowerPoint Compatible Video

Overview

We always fail to insert videos into PowerPoint presentations if the vidoes’ format is not supported by PowerPoint. The common supported video formats for PowerPoint on Windows are MPG, AVI, WMV, or ASF, and more compatible video format for PowerPoint on Mac are MP4 and MOV. You might be frustrated when you try to insert other video formats like VOB into PowerPoint. How to easily playback a video that is VOB format when inserting it into a PowerPoint presentation? Good expericence proves that converting VOB format video to a PowerPoint compatible format is the best solution.

How to Convert VOB to PowerPoint Compatible Format?

This post is aim to introduce a step by step guide on how to convert VOB to PowerPoint compatible video format like MPG. This guide is also applicable to convert other video formats like FLV, MKV, RMVB, MXF, AVCHD, Apple ProRes, MP4, MOV, TS, 3GP and etc to PowerPoint video format.

To Get Started, Please Download and Install Video Converting Software

Free download the powerful VOB to PowerPoint ConverterGilisoft Video Converter (for Windows), install and run it, the following interface will show up.

Gilisoft Video Converter is fairly easy to use. Besides converting VOB to PowerPoint video format, it also supports converting PowerPoint incompatible video formats like 3GP, FLV, F4V, OGV, WebM, WTV, DVR, MVI, MOD, TOD, MKV, TS, AVCHD, RMVB, MP4, MOV, DV and etc to PowerPoint supported format.

 Step 1 >> Import VOB Video

Click on “Add File” button to import the VOB video file which you need to convert. You can also simply drag and drop a source file into the main window of Video Converter to complete file importing.

add-mkv-file

 Step 2 >> Set/Choose PowerPoint Compatible Output Format

Click the small triangle to the right of Profile, a drop down menu for media format will pop up, select the preferable PowerPoint video format like MPG, AVI, WMV, ASF, MP4 or MOV from the “General Video” category.

Tips: To insert VOB in PowerPoint Windows version, MPEG-1 Video (*.mpg) is recommended.

mkv-to-mp4

 Step 3 >> Edit VOB Files If You Want

Before converting, you can edit the unsatisfied video by clicking the buttons on the top of the interface such as video playing effect (brightness, constract, saturation), video length and dimension.

 Step 4 >> Convert VOB to PowerPoint Video Format

Step 4 >> Convert VOB to PowerPoint Video Format
Click the “Start” button to pop up the conversion, you can preview the whole process when conversion, when finished, you can find the target file in the “Output Folder”

swf-to-mp4-conversion

After finishing converting VOB to PowerPoint video format, simply insert the converted VOB files in PowerPoint for playing VOB in PowerPoint.
Tips: make sure the converted VOB files and the PowerPoint in the same directory.

How to Add Subtitles to MP4 Videos on Windows

You can follow this guide if you Already have the corresponding subtitles for the MP4 movie files but just don’t know how to add this subtitle to MP4 video.

To Get Started, Please Download and Install Video Editor Software to Help Add Subtitles

Free download the powerful MP4 Subtitles Adder – Gilisoft Video Editor (for Windows), install and run it, the following interface will show up.
video-editor-main

 Step 1 >> Click on “Subtitle” on the Left

Gilisoft Video Editor is an all-in-one video editing software. If you need to add subtitles to a video, you can choose the module “Subtitle” from the main window.

 Step 2 >> Import MP4 Vidoes

Click on “Add Files” button to import the MP4 video file which you want to add subtitles to.

add-file

 Step 3 >> Attch Subtitles to MP4

Click on “Load Subtitle” drop-down menu to select the subtitle source file you want to add.
Optional: You can adjust the subtitle font, color, size by click the “Font” button;
Optional: You can set subtitle position by dragging the Vertical Position slider right and left or enter a value in the right text box or click up and down arrows to adjust the vertical position of the subtitle.

load-subtitle

 Step 4 >> Set Output Format

When adding subtitles to a MP4 video, you can still choose to convert the MP4 video file to other common video file formats, such as AVI, FLV, MKV…and etc.

set-output-format

 Step 5 >> Complete Adding Subtitles to MP4 Video

Click on the “Start” button to start adding subtitles to your MP4 movies.

MP4 to iTunes Converter – How to Add MP4 to iTune on Windows?

Overview

Many users always encounter iTunes won’t import MP4 issue although iTune said it can support MP4 files. There is also a problem that when we successfully added MP4 to iTunes, but iTunes still fails to sync and transfer the MP4 video files to iPod, iPhone, iPad, and Apple TV. This post is aim to describe the reason and solution to the trouble.

Why Always Can’t Add MP4 to iTunes?

MP4 is a media container format which can be encoded with many different video and audio codecs like DivX, Xvid, H.264, H.263, MPEG-4, AC3, WMA, AAC, etc. While iTunes only support few video and audio codec like MPEG-4 video codec and AAC audio codec; H.264 video codec and AAC audio codec. If the MP4 video is encode with iTunes unsupported video or audio codec, iTunes will not add and play it.

Sometimes, even if the MP4 is in the right video and audio codec that iTunes supports and we can successfully add and play MP4 in iTunes, but if the MP4 video does meet the technical specifications for iOS devices like video size, bitrates, sample rate and etc, we will still fail to sync and transfer the MP4 video from iTunes to iPod, iPad, iPhone, Apple TV and etc.

Solution – Can’t Transfer MP4 to iTunes/iPod/iPhone/iPad/Apple TV

We are finding a soluiton to solve can’t add MP4 to iTunes for palying MP4 in iTunes or transfering MP4 to iPad, iPhone, iPad, and Apple TV – That is converting iTunes unsupported MP4 to a more compatible MP4 video format.

free-download-button


To Get Started, Please Download Conversion Software

Free download the professional MP4 to iTunes Converter – Gilisoft Video Converter (for Windows), install and run it, the following main interface will pop up.

video-converter-main

 Step 1 >> Add MP4 Source File Into Video Converter

Click on the “Add Files” button on the left top of the interface to add the MP4 format files you want to convert, you can also simple drag and drop your MP4 format source files into main screen of the video converter.

add-mkv-file

 Step 2 >> Choose iTunes Supported Format

Click the “Profile” drop-down button to select iTunes supported MP4 format like ‘MP4 MPEG-4 Video(*.mp4)’ or ‘H.264/MPEG-4 AVC Video(*.mp4)’ from the “General Video” category.

mkv-to-mp4

 Step 3 >> Edit Your MP4 File If You Want

Before the conversion, you can edit the unsatisfied video by clicking the buttons on the top of the interface such as video playing effect (brightness, constract, and saturation), video length and dimension.

 Step 4 >> Convert MP4 to iTunes

Click “Start” button to start and finish the MP4 to iTunes format conversion. After finish converting MP4 to iTunes, click “Open Folder” button to get the converted MP4 for transferring to iTunes, iPad, iPod, iPhone, Apple TV.

swf-to-mp4-conversion

The Easiest and Quickest Way to Convert MOV to MP4

If you are looking for a video converter to convert mov to mp4, this website will help you a lot. Gilisoft video converter is quite simple and without quality lossness, just follow the steps below shows, you can complete the conversion in the fastest way!

Step 1 >> Download and install video converter

Gilisoft video converter is an ideal converter with high speed and supports all most popular video formats, Detials on more supported formats.

free-download-button


Step 2 >> Add your MOV format files in Gilisoft video converter

Run the Gilisoft video converter, click on the “Add files” button on the left top of the interface to add the MOV format files you want to convert, you can also simple drag and drop your MOV format source files into main screen of the video converter.

import-quicktime-video-file
Step 3 >> Edit your MOV format files if you want

Before the conversion, you can edit the unsatisfied video by clicking the buttons on the top of the interface such as video playing effect (brightness, constract, and saturation), video length and dimension.

Step 4 >> Set up the Output format (default MP4)

If you only want to convert your MOV file to MP4 formats, just keep the output format as default, Besides that, video converter provides you with multiple output formats options, you can choose and set your expected output format.

convert-mov-output-format
Step 5 >> Start the MOV to MP4 conversion

Click the “Start” button to pop up the conversion, you can preview the whole process when conversion, when finished, you can find the target file in the “Output Folder”

swf-to-mp4-conversion

How to Convert M4V to MP4 on Windows?

It may be hard for you to watch M4V file on some programs. To solve your problem, you can simply convert M4V to MP4 with Gilisoft video converter recommended in the article. And this article below will tell you the details to get it done.

Step 1 >> Download and install video converter

Gilisoft Video Converter is a ideal converter with high speed and supports all most popular video formats. Details on more supported formats.

free-download-button

Step 2 >> Add your M4V format files in Gilisoft video converter

Run the Gilisoft Video Converter, click on the “Add files” button on the left top of the interface to add the M4V format files you want to convert, you can also simply drag and drop your M4V format source files into main screen of the video converter.

import-quicktime-video-file

Step 3 >> Edit your M4V format files if you want

Before the conversion, you can edit the unsatisfied video by clicking the buttons on the top of the interface such as video playing effect (brightness, constract, and saturation), video length and dimension.

Step 4 >> Set up the Output format(default MP4)

If you only want to convert your M4V file to MP4 formats, just keep the output format as default, Besides that, video converter provides you with multiple output formats options, you can choose and set your expected output format.

convert-mov-output-format

Step 5 >> Start the M4V to MP4 conversion

Click the “Start” button to pop up the conversion, you can preview the whole process when conversion, when finished, you can find the target file in the “Output Folder”

swf-to-mp4-conversion

How to Convert FLV to MP4?

Do you have the problem that not knowing how to convert FLV to MP4? If so, then you’ve come to the right place. Now let’s have a look at Gilisoft FLV to MP4 converter, which is especially designed for converting FLV to MP4 files. It offers superb fast conversion speed and outstanding audio/video quality. With it, everyone can become the master of FLV to MP4. Now, let me tell you how to use it!

Step 1 >> Download and install video converter

free-download-button

Gilisoft video converter is a ideal converter with high speed and supports all most popular video formats.

Step 2 >> Add your FLV format files into Gilisoft video converter

Run the Gilisoft video converter, click on the “Add files” button on the left top of the interface to add the FLV format files you want to convert, you can also simply drag and drop your FLV format source files into main screen of the video converter.

add-flv-file

Step 3 >> Edit your FLV format files if you want

Before the conversion, you can edit the unsatisfied video by clicking the buttons on the top of the interface such as video playing effect (brightness, constract, saturation), video length and dimension.

Step 4 >> Set up the Output format(default MP4)

If you only want to convert your FLV file to MP4 formats, just keep the output format as default, Besides that, video converter provides you with multiple output formats options, you can choose and set your expected output format.

mkv-to-mp4

Step 5 >> Start the FLV to MP4 conversion

Click the “Start” button to pop up the conversion, you can preview the whole process when conversion, when finished, you can find the target file in the “Output Foulder”

swf-to-mp4-conversion

How to Convert QuickTime files to MP4, AVI, FLV, WMV, and Others

Gilisoft QuickTime Video Converter is an efficient program to convert QuickTime MOV, QT, MP4 and M4V files to AVI, DivX, Xvid, MPEG2, MPEG2, VCD, SVCD and DVD formats. It also lets you convert other video format to QuickTime MOV format, too. The program uses fast encoding and decoding system to ease your real media conversion jobs.

Getting started to converting your QuickTime video? Below is a step-by-step tutorial in detailed description, just follow it.

Step 1 >> Download Gilisoft QuickTime Video Converter NOW

how-tos-wiki-img


Step 2 >> Import Your Input File

After installing Gilisoft QuickTime Video Converter, please run it at first, then import your source file by clicking “Add File” button, or you can directly drag and drop your source file into the main window of this converter.

import-quicktime-video-file
Step 3 >> Set Output Format

100+ file formats are supported by Gilisoft Video Converter. You can simply select most common used video formats like MOV/MP4/AVI/FLV from output format setting option. In order to satisfy your special needs, you can change the video quality and video frame size.

convert-mov-output-format


Step 4 >> Start Converting Process

When input and output selection is ready, all you are left to do is to click the big “Start” button. In several minutes, the conversion task will complete. Then you can click on “Open Output” to view the converted videos.


How to convert WMV to MP4?

Upset of can’t converting WMV to MP4 as you want? Gilisoft Video Vonverter is an ideal converter, with which you can convert WMV to MP4 speedy without quality lost!

Gilisoft Video Converter is quite simple, just follow the steps below shows, you can complete the conversion in the fastest way!

Step 1 >> Download and install video converter

free-download-button

Gilisoft video converter is an ideal converter with high speed and supports all most popular video formats, Details on more supported formats.

Step 2 >> Add your WMV format files in Gilisoft video converter

Run the Gilisoft video converter, click on the “Add files” button on the left top of the interface to add the WMV format files you want to convert, you can also simple drag and drag your WMV format source files into main screen of the video converter.

add-wmv-file

Step 3 >> Edit your WMV format files if you want

Before the conversion, you can edit the unsatisfied video by clicking the buttons on the top of the interface such as video playing effect (brightness, contrast, and saturation), video length and dimension.

Step 4 >> Set up the Output format (default MP4)

If you only want to convert your WMV file to MP4 formats, just keep the output format as default, Besides that, video converter provides you with multiple output formats options, you can choose and set your expected output format.

mkv-to-mp4

Step 5 >> Start the WMV to MP4 conversion

Click the “Start” button to pop up the conversion, you can preview the whole process when conversion, when finished, you can find the target file in the “Output Folder”

wmv-to-mp4-conversion